How to Make Perfect Homemade Breadsticks
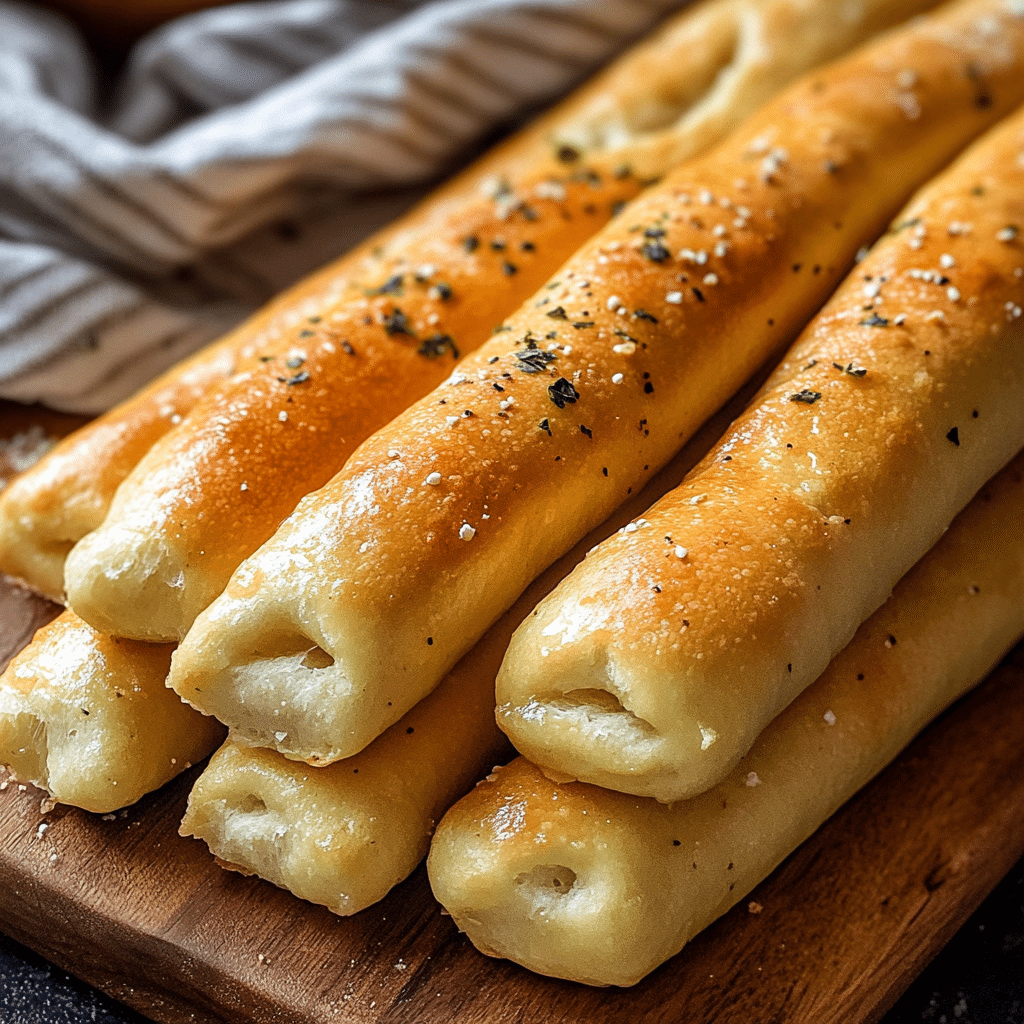
Homemade breadsticks are an unbeatable snack or dinner side, offering a delightful blend of soft interiors and perfectly crispy exteriors. With our easy recipe for Homemade Breadsticks, you’ll unlock the secrets to creating these warm, golden treats that pair beautifully with everything from pasta dishes to soups or simply as a satisfying snack all on their own.
Why You’ll Love This Recipe
- Simple Ingredients: Uses everyday pantry staples that come together effortlessly.
- Perfect Texture: Achieves that ideal soft inside with a golden, crispy crust every time.
- Versatile Snack: Great for dipping or accompanying any meal, adding a homemade touch.
- Customizable Flavors: Easily adjusted with herbs, garlic, or cheese to match your cravings.
- Great for Beginners: Step-by-step instructions that won’t overwhelm anyone new to baking.
Ingredients You’ll Need
The beauty of this recipe lies in its simple but essential ingredients, each playing a vital role in bringing out the authentic, delicious flavor, and texture of Homemade Breadsticks. From flour for structure to olive oil for richness, every component is carefully chosen to deliver perfect results.
- All-purpose flour: The foundation for tender but sturdy breadsticks with a great crumb.
- Active dry yeast: Helps the dough rise and become airy and light.
- Warm water: Activates the yeast and hydrates the dough for soft texture.
- Olive oil: Adds a subtle richness and keeps the breadsticks moist.
- Sugar: Feeds the yeast and helps develop a beautiful golden color.
- Salt: Enhances all the flavors and balances the sweetness.
- Garlic powder (optional): Introduces a gentle, savory note if you like a hint of garlic.
- Butter (for brushing): Provides a shiny finish and buttery flavor to the breadsticks post-baking.
- Grated Parmesan or herbs (optional): Perfect for topping and adding extra flavor and texture.
Variations for Homemade Breadsticks
This homemade breadstick recipe is a fantastic starting point you can easily customize. Don’t hesitate to put your spin on it based on what you have available or your personal tastes—it’s super forgiving and endlessly adaptable!
- Cheesy Breadsticks: Add shredded mozzarella or cheddar cheese into the dough or sprinkle on top before baking.
- Herb-Infused: Mix in dried herbs like rosemary, thyme, or oregano for earthy, aromatic breadsticks.
- Garlic Butter Twist: Brush with garlic butter right out of the oven for extra richness and flavor.
- Whole Wheat Version: Substitute part or all of the all-purpose flour with whole wheat for a nuttier, wholesome taste.
- Gluten-Free Option: Use a gluten-free flour blend to keep the breadsticks friendly for gluten sensitivity.

How to Make Homemade Breadsticks
Step 1: Activate the Yeast
Start by combining warm water and sugar in a bowl, then sprinkle the yeast on top. Let it sit for about 5 to 10 minutes until it becomes foamy, indicating that the yeast is alive and ready to work its magic.
Step 2: Mix the Dough
In a large bowl, combine the flour, salt, and optional garlic powder. Slowly pour in the activated yeast mixture along with the olive oil. Stir until a shaggy dough forms.
Step 3: Knead Until Smooth
Turn the dough out onto a floured surface and knead it for 8 to 10 minutes until smooth and elastic. This develops the gluten network that gives breadsticks their chewy texture.
Step 4: First Rise
Place the dough in an oiled bowl, cover it with a clean towel, and let it rise in a warm spot for about 1 hour, or until doubled in size.
Step 5: Shape the Breadsticks
Punch down the dough, then divide it into equal portions. Roll each portion into long thin sticks, aiming for consistent thickness so they bake evenly.
Step 6: Second Rise
Arrange the dough sticks on a baking sheet lined with parchment paper, leaving some space between each. Cover loosely and let them rise for 20 to 30 minutes until slightly puffed.
Step 7: Bake to Perfection
Preheat your oven to 400°F (200°C). Bake the breadsticks for 12 to 15 minutes or until golden brown. If desired, brush with melted butter and sprinkle with cheese or herbs immediately after baking.
Pro Tips for Making Homemade Breadsticks
- Use warm, not hot water: Water around 110°F is perfect to activate yeast without killing it.
- Don’t over-knead: Enough to develop elasticity but not so much you dry out your dough.
- Even sizing: Roll the dough sticks as uniformly as possible to ensure all bake evenly.
- Brush while warm: Applying butter immediately after baking helps it soak in for maximum flavor.
- Experiment with toppings: Try everything from sesame seeds to coarse sea salt for exciting textures.
How to Serve Homemade Breadsticks
Garnishes
You can dress up your breadsticks with a sprinkle of fresh herbs like parsley or basil, sesame seeds, or even a dusting of Parmesan cheese right after brushing with butter to add a beautiful finishing touch.
Side Dishes
These breadsticks perfectly complement Italian meals such as pasta, lasagna, and salads. They also pair wonderfully with hearty soups or stews, adding a delicious way to soak up sauces and broths.
Creative Ways to Present
Try arranging breadsticks in a festive basket lined with a colorful kitchen towel or serve with an assortment of dips like marinara, garlic butter, or creamy spinach dip. Twisting or braiding the dough before baking can make them look more elegant for special occasions.
Make Ahead and Storage
Storing Leftovers
Keep any leftover Homemade Breadsticks in an airtight container at room temperature for up to 2 days. To preserve freshness, avoid refrigerating as it can dry them out.
Freezing
You can freeze baked breadsticks by wrapping them tightly in foil or plastic wrap, then placing them in freezer bags. They’ll keep well for up to 3 months and thaw quickly when you need a quick snack.
Reheating
Reheat breadsticks in a preheated oven at 350°F (175°C) for 5 to 7 minutes to bring back their crispiness and warmth. A quick zap in the microwave works for softening but won’t maintain the crust’s crunch.
FAQs
Can I use instant yeast instead of active dry yeast?
Yes, instant yeast can be used and often doesn’t require proofing; simply mix it directly with the flour and reduce water slightly if needed.
How do I make my breadsticks crispier?
To get crispier breadsticks, bake a few extra minutes until golden and avoid covering them immediately after baking so steam doesn’t soften the crust.
Can I freeze the dough before baking?
Absolutely! After the first rise, shape the dough sticks, then freeze them on a tray before transferring to a freezer bag. Thaw and let rise before baking as usual.
Are homemade breadsticks healthier than store-bought?
Homemade breadsticks typically contain fewer preservatives and allow you to control the quality and amount of ingredients, making them a healthier option overall.
What can I use to flavor breadsticks besides garlic?
Try mixing in herbs like rosemary, thyme, or basil, adding cheese, or sprinkling seeds such as sesame or poppy for a burst of flavor variety.
Final Thoughts
Making your own Homemade Breadsticks is such a satisfying and delicious experience. Once you taste their soft yet crispy perfection fresh from your oven, you’ll wonder how you ever relied on store-bought versions. Don’t hesitate to try this recipe, customize it to your liking, and share these delightful breadsticks with family and friends—it’s a small homemade pleasure that brings big joy.
Related Posts
- Easy Pumpkin Deviled Eggs for Fall Parties
- Spooky Halloween Chex Mix Snack Ideas
- Irresistible Chicken Enchilada Dip with Homemade Tortilla Graves
Homemade Breadsticks
Homemade breadsticks are a simple and versatile snack or side dish featuring a perfect balance of soft interiors and crispy golden crusts. Made with everyday pantry staples, these breadsticks are easy to prepare, customizable with herbs, cheese, or garlic, and complement a wide range of meals from pasta to soups or enjoyed on their own.
- Prep Time: 15 minutes
- Cook Time: 12 to 15 minutes
- Total Time: 1 hour 30 minutes
- Yield: 12 breadsticks 1x
- Category: Appetizers
- Method: Baking
- Cuisine: Italian
- Diet: Gluten Free
Ingredients
Main Ingredients
- 2 1/4 teaspoons active dry yeast (1 packet)
- 1 cup warm water (about 110°F or 43°C)
- 1 tablespoon sugar
- 2 1/2 cups all-purpose flour (substitute with whole wheat or gluten-free flour blend as desired)
- 1 teaspoon salt
- 1 tablespoon olive oil
- 1/2 teaspoon garlic powder (optional)
For Brushing and Topping
- 2 tablespoons butter, melted (for brushing)
- Grated Parmesan cheese or dried herbs like rosemary, thyme, or oregano (optional)
Instructions
- Activate the Yeast: Combine warm water and sugar in a bowl, then sprinkle the active dry yeast on top. Let it sit for 5 to 10 minutes until it becomes foamy, indicating the yeast is active.
- Mix the Dough: In a large bowl, mix the flour, salt, and optional garlic powder. Gradually add the yeast mixture and olive oil, stirring until a shaggy dough forms.
- Knead Until Smooth: Turn the dough onto a floured surface and knead for 8 to 10 minutes until smooth and elastic, developing the gluten for a chewy texture.
- First Rise: Place the dough in an oiled bowl, cover with a clean towel, and let it rise in a warm spot for about 1 hour, or until doubled in size.
- Shape the Breadsticks: Punch down the dough and divide it into equal portions. Roll each portion into long thin sticks, keeping them uniform for even baking.
- Second Rise: Arrange the dough sticks on a parchment-lined baking sheet, leave space between each, cover loosely, and let rise for 20 to 30 minutes until slightly puffed.
- Bake to Perfection: Preheat the oven to 400°F (200°C). Bake the breadsticks for 12 to 15 minutes or until golden brown. Immediately after baking, brush with melted butter and sprinkle with cheese or herbs if desired.
Notes
- Use warm water (around 110°F) to activate yeast without killing it.
- Do not over-knead the dough; knead only until smooth and elastic.
- Roll breadsticks evenly to ensure uniform baking.
- Brush melted butter onto warm breadsticks to maximize flavor absorption.
- Experiment with toppings like sesame seeds, coarse sea salt, or different herbs for variety.
- Instant yeast can be used by mixing directly with flour and adjusting water slightly; no need to proof.
- For crispier breadsticks, bake a few minutes longer and avoid covering to keep the crust dry.
- Dough can be frozen after shaping and before the second rise; thaw and rise before baking.
- Store leftover breadsticks at room temperature in an airtight container up to 2 days. Avoid refrigeration to prevent drying.
- Reheat breadsticks in a 350°F (175°C) oven for 5 to 7 minutes for best texture.
Nutrition
- Serving Size: 1 breadstick
- Calories: 120
- Sugar: 1 g
- Sodium: 180 mg
- Fat: 3 g
- Saturated Fat: 1 g
- Unsaturated Fat: 2 g
- Trans Fat: 0 g
- Carbohydrates: 22 g
- Fiber: 1 g
- Protein: 3 g
- Cholesterol: 2 mg
Keywords: homemade breadsticks, breadsticks recipe, easy breadsticks, soft breadsticks, crispy crust, snack, appetizer, Italian breadsticks, garlic breadsticks, cheesy breadsticks, herb breadsticks