Easy Air-Fryer Pita Snacks You’ll Love

If you’re on the hunt for a snack that’s crispy, quick, and packed with flavor, look no further than our easy Air-Fryer Pita. This delightful treat transforms simple pita bread into a crunchy, golden snack perfect for any time of day. Whether you want a healthy munching option or a satisfying side, Air-Fryer Pita snacks are incredibly easy to whip up and endlessly customizable to suit your taste buds.
Why You’ll Love This Recipe
- Super quick preparation: From prep to plate in under 20 minutes, making it perfect for busy days or last-minute cravings.
- Deliciously crispy texture: The air fryer delivers a perfectly crunchy finish without the need for deep frying.
- Highly versatile: Customize with spices, dips, or toppings to match any flavor profile you love.
- Healthier than traditional frying: Uses minimal oil, packing less fat but keeping big taste.
- Kid-friendly and crowd-pleasing: Everyone’s guaranteed to enjoy these simple yet irresistible snacks.
Ingredients You’ll Need
Gathering these few, pantry-friendly ingredients is all you need. Each one builds the delicious foundation for crispy, flavorful Air-Fryer Pita snacks that keep you coming back for more.
- Pita bread: Choose fresh or slightly stale pita for best crisping results in the air fryer.
- Olive oil: A light coating helps achieve golden crunch while adding subtle richness.
- Salt: Enhances all the layers of flavor effortlessly.
- Optional spices: Paprika, garlic powder, or za’atar bring unique twists and depth to your pita snacks.
- Fresh herbs (optional): Parsley or oregano for a refreshing touch after cooking.
Variations for Air-Fryer Pita
One of the best things about this Air-Fryer Pita recipe is how simple it is to adapt. Feel free to experiment with different seasonings, dips, and even types of bread to find your perfect combination.
- Spicy Kick: Add cayenne pepper or chili flakes for a zesty twist.
- Cheesy Delight: Sprinkle with grated parmesan or nutritional yeast before air frying for a savory, cheesy boost.
- Gluten-Free Option: Use gluten-free pita or flatbread and enjoy all the crunch without gluten worries.
- Herb-Infused: Toss with mixed Italian herbs and lemon zest for bright, aromatic flavor.
- Sweet & Savory: Lightly brush with honey and cinnamon for a dessert-style treat that’s surprisingly addictive.

How to Make Air-Fryer Pita
Step 1: Prep the Pita
Begin by cutting your pita bread into bite-sized wedges or strips, making sure all pieces are evenly sized for uniform crisping.
Step 2: Season the Pita
In a bowl, drizzle the pita pieces with olive oil and toss them with salt and your preferred spices, ensuring every piece is lightly coated.
Step 3: Arrange in the Air Fryer
Spread the pita wedges out in a single layer inside the air-fryer basket, avoiding overcrowding to allow maximum airflow for even cooking.
Step 4: Cook to Crispy Perfection
Air fry at 350°F (175°C) for about 6 to 8 minutes, shaking the basket halfway through to prevent sticking and promote even browning.
Step 5: Cool and Serve
Once golden and crisp, remove the pita snacks and let them cool slightly before serving to achieve the best crunch and flavor.
Pro Tips for Making Air-Fryer Pita
- Choose the right pita: Thinner, pocketless pita works best for even crisping without getting too hard.
- Don’t skip tossing: Tossing halfway through cooking ensures all pieces crisp evenly, avoiding soggy sections.
- Use light oil coating: A small amount of oil keeps the pita crispy but avoids greasy results.
- Keep it single-layered: Avoid stacking pita pieces in the air fryer basket for consistent airflow and crunch.
- Monitor cooking time closely: Depending on your air fryer, times may vary slightly—watch carefully to avoid burning.
How to Serve Air-Fryer Pita
Garnishes
Add a sprinkle of fresh herbs like parsley, cilantro, or oregano on top for a fresh punch of flavor and a visually appealing finish.
Side Dishes
Serve alongside hummus, tzatziki, guacamole, or your favorite dips to elevate this snack into a satisfying appetizer or side dish.
Creative Ways to Present
Use Air-Fryer Pita chips as croutons in salads or soups, or create mini pita snack boards with cheese and olives for a fun shared platter.
Make Ahead and Storage
Storing Leftovers
Keep any leftover pita snacks in an airtight container at room temperature for up to two days to maintain crispness.
Freezing
Place cooled pita snacks in a freezer-safe bag and freeze for up to a month; they reheat beautifully straight from frozen.
Reheating
To revive crunchiness, quickly air fry leftovers at 320°F (160°C) for 2 to 3 minutes or toast in the oven to enjoy warm and crispy bites again.
FAQs
Can I use pita bread that is not fresh?
Yes, slightly stale pita actually makes for better Air-Fryer Pita because it crisps up beautifully without getting too soft or chewy.
Is it necessary to add oil?
A light coating of oil helps the pita become golden and crunchy, but you can reduce the amount for a lower-fat version.
Can I make this recipe gluten-free?
Absolutely! Substitute regular pita with gluten-free pita or flatbreads and follow the same steps for delicious, gluten-free snacks.
How long do these pita snacks stay crispy?
If stored properly in an airtight container, they stay crispy for up to two days, but are best enjoyed fresh for peak crunch.
What dips go best with Air-Fryer Pita?
Classic options like hummus and tzatziki work great, but you can get creative with baba ghanoush, salsa, or any creamy dip you love.
Final Thoughts
Making Air-Fryer Pita is a wonderful way to enjoy a quick, crunchy snack with endless flavor possibilities. It’s simple, satisfying, and sure to become a staple in your snack rotation. Give this recipe a try, and watch how easily it wins a spot at your table any day of the week!
Related Posts
- How to Make Perfect Homemade Breadsticks
- Crispy Zucchini & Sweet Potato Fritters You’ll Love
- Easy Pumpkin Deviled Eggs for Fall Parties
Air-Fryer Pita
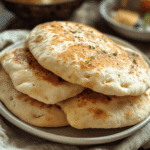
Quick and crispy Air-Fryer Pita snacks made by transforming simple pita bread into golden, crunchy wedges with a light coating of olive oil and seasonings. These versatile, healthy snacks are ready in under 20 minutes and customizable with various spices, herbs, and dips, perfect for a flavorful appetizer or side dish.
- Prep Time: 5 minutes
- Cook Time: 6 to 8 minutes
- Total Time: 11 to 13 minutes
- Yield: 4 servings
- Category: Appetizers
- Method: Air Frying
- Cuisine: Mediterranean
- Diet: Gluten Free (if using gluten-free pita)
Ingredients
Main Ingredients
- Pita bread: fresh or slightly stale, enough for desired servings (typically 2–3 pita breads)
- Olive oil: about 1 to 2 tablespoons for light coating
- Salt: to taste
Optional Spices
- Paprika: ½ teaspoon (optional)
- Garlic powder: ½ teaspoon (optional)
- Za’atar: ½ teaspoon (optional)
- Cayenne pepper or chili flakes: to taste (optional for spicy kick)
- Grated parmesan or nutritional yeast: 1 to 2 tablespoons (optional for cheesy delight)
- Mixed Italian herbs: ½ teaspoon (optional for herb-infused flavor)
- Lemon zest: 1 teaspoon (optional for herb-infused flavor)
- Honey and cinnamon: 1 teaspoon honey and ¼ teaspoon cinnamon (optional for sweet & savory variation)
Fresh Herbs (Optional Garnish)
- Parsley: a small handful, chopped
- Oregano: a few sprigs, chopped
- Cilantro: a small handful, chopped (optional)
Instructions
- Prep the Pita: Begin by cutting your pita bread into bite-sized wedges or strips, making sure all pieces are evenly sized for uniform crisping.
- Season the Pita: In a bowl, drizzle the pita pieces with olive oil and toss them with salt and your preferred spices, ensuring every piece is lightly coated.
- Arrange in the Air Fryer: Spread the pita wedges out in a single layer inside the air-fryer basket, avoiding overcrowding to allow maximum airflow for even cooking.
- Cook to Crispy Perfection: Air fry at 350°F (175°C) for about 6 to 8 minutes, shaking the basket halfway through to prevent sticking and promote even browning.
- Cool and Serve: Once golden and crisp, remove the pita snacks and let them cool slightly before serving to achieve the best crunch and flavor. Optionally, sprinkle with fresh herbs before serving.
Notes
- Choose thinner, pocketless pita breads for best crisping results without becoming too hard.
- Toss the pita pieces halfway through cooking to ensure even crispiness and avoid soggy spots.
- Use only a light coating of olive oil to keep the pita crispy without greasiness.
- Arrange pita chips in a single layer in the air fryer basket for consistent airflow and crunch.
- Cooking times may vary between air fryer models; watch closely to prevent burning.
- Store leftover pita chips in an airtight container at room temperature for up to two days to maintain crispness.
- You can freeze cooled pita chips in a freezer-safe bag for up to one month; reheat directly from frozen for best results.
- Reheat leftovers by air frying at 320°F (160°C) for 2 to 3 minutes or toasting in the oven to restore crunchiness.
Nutrition
- Serving Size: 1 serving (approx. ½ pita bread worth)
- Calories: 120
- Sugar: 0.5g
- Sodium: 150mg
- Fat: 5g
- Saturated Fat: 0.7g
- Unsaturated Fat: 4g
- Trans Fat: 0g
- Carbohydrates: 16g
- Fiber: 1.5g
- Protein: 3g
- Cholesterol: 0mg
Keywords: Air fryer pita, crispy pita chips, healthy snack, quick appetizer, gluten-free snack, easy air fryer recipe